

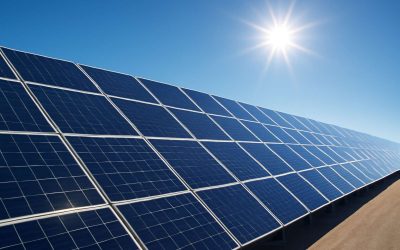
Understanding Solar Panels and Their Components
Basics of Solar Energy – How Solar Panels Convert Sunlight into Electricity
In the silent ballet of the cosmos, sunlight dances upon the earth, whispering secrets of boundless energy. To harness this celestial gift, understanding the core components of solar panels becomes essential—those intricate yet elegant structures that convert daylight into a symphony of electricity. When contemplating how to make a solar panel, one must first appreciate the delicate interplay of photovoltaic cells, protective glass, and conductive layers, each playing its part in this technological marvel.
Solar panels operate on a simple yet profound principle: photons from the sun strike the semiconductor material within, dislodging electrons and creating an electric current. This process, known as the photovoltaic effect, is the heartbeat of solar energy. For those eager to craft their own, it’s vital to grasp the fundamental components involved—such as silicon cells, wiring, and framing—to ensure the creation of a resilient and efficient system. In essence, every element must harmonize to turn sunlight into usable power, illuminating not just our homes but our minds with the promise of sustainable energy.
Components of a Solar Panel – Solar Cells, Glass Cover, Frame, Backsheet, Junction Box
Understanding the inner workings of a solar panel is crucial when learning how to make a solar panel. Each component plays a vital role in transforming sunlight into usable electricity. The core of this process lies within the solar cells, which are the heart of any DIY solar panel project. These cells, often made from silicon, absorb sunlight and generate an electric current through the photovoltaic effect.
The protective glass cover shields the delicate cells from environmental damage while allowing maximum sunlight penetration. Surrounding the cells, the frame offers structural support, ensuring the panel withstands harsh weather conditions. The backsheet, a durable layer behind the solar cells, prevents moisture intrusion and enhances longevity. Lastly, the junction box serves as the connection point, where wiring routes the generated electricity to your system.
When exploring how to make a solar panel, keep in mind the following essential components:
- Solar cells
- Glass cover
- Frame
- Backsheet
- Junction box
Each element must be carefully selected and assembled to create a resilient, efficient solar panel suited for South Africa’s climate. Mastering the components ensures a sustainable energy solution tailored to your needs and helps you harness the sun’s power effectively.
Types of Solar Cells – Monocrystalline, Polycrystalline, Thin-Film
Understanding solar panels and their various components is essential when learning how to make a solar panel that truly endures the South African climate. Solar panels come in different types, each crafted with unique materials and efficiencies. The core of these panels is the solar cell, which directly influences how much energy your homemade system can generate. It’s fascinating how these tiny silicon wafers can harness the sun’s power so effectively.
There are three primary types of solar cells to consider:
- Monocrystalline: Known for their high efficiency, these cells have a uniform appearance and are often the most durable. They perform well even in low-light conditions, making them a popular choice for remote rural areas.
- Polycrystalline: Slightly less efficient but more affordable, these cells have a speckled, mosaic-like look. They are a practical option for those venturing into how to make a solar panel without breaking the bank.
- Thin-Film: The most flexible and lightweight, thin-film solar cells are less efficient but excel in hot climates and can be integrated into various surfaces, broadening the possibilities of DIY projects.
Each type of solar cell has its advantages and challenges, but understanding these differences helps you tailor your project to meet specific energy needs. When exploring how to make a solar panel, selecting the right kind of solar cell is just as vital as assembling the other components to ensure your system is resilient and efficient for everyday use in South Africa’s diverse environment.
Gathering Materials and Tools for DIY Solar Panel Creation
Essential Materials – Solar Cells, Tempered Glass, Aluminum Frame, Solder, Connecting Wires
Embarking on the journey of how to make a solar panel begins with gathering the right materials—each one vital to transforming sunlight into usable energy. In rural South Africa, where energy access can be unpredictable, building your own solar panel can be a game-changer. Think of it as crafting a small miracle with your own hands, blending resourcefulness with ingenuity.
The core ingredients include high-quality solar cells, tempered glass to protect your delicate components, an sturdy aluminum frame for durability, solder for secure connections, and connecting wires to tie everything together. Finding reliable sources for these materials can be a challenge, but local suppliers often carry these essentials. Properly sourcing these components ensures your solar panel will withstand the harsh African sun and deliver consistent performance.
- Solar Cells
- Tempered Glass
- Aluminum Frame
- Solder
- Connecting Wires
Assembling these materials with care and patience turns raw components into a powerful device—one that can light up a home, charge a phone, or power a small workshop. This process embodies resilience, turning simple materials into a symbol of hope and independence in communities that need it most.
Optional Tools – Soldering Iron, Multimeter, Wire Strippers, Drill
In the heart of rural South Africa, where sunlight kisses the earth with relentless fervor, the question of how to make a solar panel becomes a dance of ingenuity and hope. Before the first beam touches your creation, gathering the right materials and tools is an act of quiet rebellion against darkness. Each component—solar cells, tempered glass, aluminum frame—must be chosen with care, like selecting the notes for a symphony of sustainable energy.
Essential tools elevate this craft from mere assembly to artistry. A soldering iron, for instance, is the maestro’s wand—binding delicate connections with precision. A multimeter becomes your trusted scout, revealing the silent language of electricity flowing through your handmade masterpiece. Wire strippers clear the path for clean, secure connections, while a drill can turn raw materials into a fortress of durability. Sometimes, an ordered approach helps—consider this simple sequence:
- Gather your tools and materials.
- Prepare your solar cells and connect them carefully.
- Secure the assembly within the aluminum frame and protect it with tempered glass.
In this process, patience and resilience transform humble supplies into a beacon of empowerment. Building a solar panel isn’t just about harnessing sunlight; it’s about illuminating possibilities—one wire, one solder joint, one hopeful step at a time!
Safety Equipment – Gloves, Safety Glasses
Embarking on the journey of how to make a solar panel begins with gathering the right materials and tools. In rural South Africa, resourcefulness is essential—every item counts. Start by collecting high-quality solar cells, tempered glass, and an aluminum frame. These core components form the backbone of your DIY solar panel. Equally important are connecting wires and solder, which ensure solid electrical connections.
Safety cannot be overlooked. Protect yourself with gloves and safety glasses during the assembly process. Gloves shield your hands from sharp edges and hot solder, while safety glasses prevent debris from causing injuries. Handling delicate solar cells demands patience and precision, making safety equipment a vital part of your toolkit. Remember, a well-prepared workspace reduces mishaps and ensures your project progresses smoothly.
To streamline your build, consider organizing your tools in an orderly fashion. An efficient workspace with all necessary items within reach makes the process more manageable. Whether you’re working outdoors or in a small workshop, safety and preparation are the first steps to successfully learning how to make a solar panel that can power your home or community.
Step-by-Step Guide to Making a Solar Panel
Preparing the Solar Cells – Testing and Sorting Cells for Efficiency
Within the shadowy realm of crafting your own solar salvation, the journey begins with testing and sorting the very heart of your creation—solar cells. These tiny harbingers of light hold secrets that can either harness the sun’s wrath or squander its gift. To master the art of how to make a solar panel, meticulous scrutiny is paramount. Each cell must be examined for cracks, blemishes, and efficiency; only the most pristine will become the conduits of power. Testing with a multimeter reveals their true potential—measuring voltage and current, unmasking their hidden vitality.
Once sorted, the selected cells are arranged with precision—often in series—to amplify their collective might. This delicate choreography ensures the final solar panel emerges from the shadows as a beacon of sustainable energy. The process is akin to forging a dark mirror that captures sunlight’s essence, transforming it into a reliable force of nature. For those daring enough to learn how to make a solar panel, understanding the importance of careful testing and sorting is the first step toward awakening the power of the sun in your own hands.
Assembling the Solar Cells – Connecting Cells in Series or Parallel
Embarking on the journey of how to make a solar panel requires more than just stacking solar cells; it demands precision in connecting each component to harness maximum energy. Once you’ve tested and sorted your high-efficiency solar cells, the next crucial step is assembling them correctly. The way you connect your cells—either in series or parallel—determines the voltage and current output of your homemade solar panel.
Connecting cells in series boosts voltage, ideal for powering larger systems, while parallel connections increase current, perfect for low-voltage applications. To achieve this, carefully solder connecting wires between the positive terminal of one cell and the negative of the next. Use a soldering iron for a clean, durable bond—attention to detail here is key! For those new to the craft, an ordered approach can simplify the process:
- Align the solar cells on a flat, clean surface.
- Start with the first cell’s positive terminal.
- Connect it to the negative terminal of the next cell using soldered wires.
- Repeat the process until all cells are linked in series or parallel, depending on your desired voltage and current.
This meticulous choreography transforms a cluster of fragile solar cells into a robust, functioning solar panel—ready to convert sunlight into usable electricity. Remember, the key to mastering how to make a solar panel lies in the precision of these connections; each soldered joint is a step toward sustainable energy independence.
Creating the Panel Backing and Frame – Cutting and Mounting the Support Structure
Once your solar cells are meticulously connected and tested, the next vital step in how to make a solar panel involves creating a sturdy, weather-resistant foundation. This is where the panel backing and frame come into play, providing both structural integrity and protection against the elements. Crafting this support structure transforms your delicate assembly into a resilient powerhouse capable of enduring South Africa’s diverse climate conditions.
The process begins with selecting the right materials—primarily aluminum or sturdy wooden frames—that will support the solar cells without adding unnecessary weight. Cutting the support structure to size requires precision, ensuring the frame fits seamlessly around your array of solar cells. Once cut, the mounting support is secured onto a flat surface, often using strong adhesives or brackets designed for outdoor use. This setup guarantees that each cell remains in position, optimizing sunlight absorption and energy conversion.
To simplify the mounting process, consider the following steps:
- Measure and mark the dimensions of your solar panel, accounting for the size of your solar cells and the frame’s border.
- Use a saw or cutting tool to shape the support structure accurately.
- Attach the frame securely onto a flat, clean surface—this could be a base or mounting board—using appropriate fasteners.
- Ensure the structure is level and stable before fixing the solar cells onto the backing.
By meticulously cutting and mounting the support structure, you lay a solid foundation that not only protects your solar cells but also maximizes their exposure to sunlight. This craftsmanship elevates your project from a simple experiment to a professional-grade solar panel, capable of generating sustainable energy in South Africa’s sunny climate—and beyond!
Attaching Solar Cells to the Backing – Using Conductive Adhesive or Soldering
In the shadowed realm of solar craftsmanship, the act of attaching solar cells to their backing is where the magic truly begins—transforming fragile fragments of silicon into a conduit of boundless energy. Whether you choose conductive adhesive or the ancient art of soldering, each method carries its own dark allure, demanding patience and precision. Soldering, with its hiss and crackle, forges a lasting bond that whispers of resilience, while conductive adhesive offers a less invasive, yet equally potent, connection, preserving the delicate integrity of each cell.
To make a solar panel that endures South Africa’s fierce sun and unpredictable storms, meticulous care is essential. Begin by laying out your solar cells in their destined arrangement—testing each for efficiency, sorting out the brightest amidst the shadows. Once aligned, apply the conductive adhesive evenly or carefully solder each connection, ensuring a seamless flow of energy. The goal is a cohesive, silent network that captures sunlight with unwavering resolve.
Remember, the path to mastering how to make a solar panel is paved with patience and precision. Each connection, each bond, is a whisper of the sun’s dark promise—power waiting to be unleashed from pure, silenced silicon. The process is as much an act of craftsmanship as it is an artistry—an ode to the relentless pursuit of sustainable energy in a world of shadows and light.
Encapsulating the Cells – Applying Tempered Glass Cover and Sealant
Once the solar cells are securely encapsulated, the next phase in mastering how to make a solar panel involves protecting them with tempered glass and ensuring a robust sealant application. This layer acts as a shield against South Africa’s fierce sun, dust, and sudden storms. Carefully placing the tempered glass cover over the assembled cells not only preserves their integrity but also maximizes sunlight absorption. The glass must be clean and free of any scratches to prevent shadowing that could diminish efficiency.
Applying the sealant with precision is crucial—this acts as a barrier against moisture and environmental contaminants, extending the lifespan of your solar panel. For a seamless finish, run a thin, even bead of sealant along the edges of the glass before carefully pressing it into place.
- Ensure the sealant is compatible with outdoor conditions and UV-resistant for durability.
Additionally, some builders opt for a vacuum or press to eliminate air bubbles, which could compromise the protective layer’s effectiveness. This meticulous process transforms a simple array of solar cells into a resilient power-generating masterpiece—an artful synthesis of engineering and craftsmanship that reveals the true potential of sustainable energy.
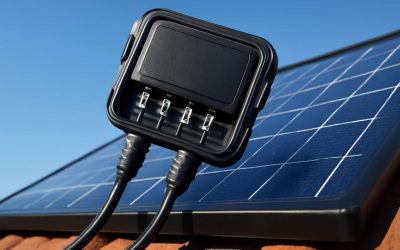
Connecting the Electrical Components – Wiring to Junction Box and Ensuring Proper Connections
In the shadowed corridors of sustainable ingenuity, wiring the electrical components of your solar panel becomes a ritual of precision and patience. South Africa’s unforgiving sun demands that every connection be flawless—each wire a lifeline carrying the captured energy into the heart of your system. As you assemble the electrical pathways, understanding how to make a solar panel involves meticulous attention to detail, ensuring that each junction is both secure and efficient.
Connecting the solar cells to a junction box is the pivotal moment where raw sunlight transforms into usable power. This process requires careful soldering or conductive adhesive application—every strand of wire must be laid with purpose. To prevent power loss or short circuits, double-check your connections with a multimeter, confirming that the voltage and current flow as intended. For those venturing deeper into this craft, consider the following steps:
- Strip the connecting wires with precision, exposing just enough metal for a solid bond.
- Attach the positive terminal wire to the positive bus within the junction box, then do the same with the negative terminal.
- Ensure all connections are tight and insulated to withstand South Africa’s volatile weather conditions.
By embracing the dark, methodical art of wiring, you forge a resilient conduit that channels the sun’s fierce energy into your power system—an alchemy born from knowledge and craftsmanship. Properly connected, your solar panel becomes more than just a collection of parts; it transforms into a conduit of life, powering your world with the relentless force of the sun.
Sealing and Finishing the Panel – Adding Sealant for Weatherproofing
After the intricate dance of assembling your solar cells and wiring their delicate pathways, the final act in creating a solar panel involves sealing and finishing with purpose. Sealing the panel is not merely an act of closure, but an essential ritual to shield your masterpiece from South Africa’s fierce weather, relentless sun, and sudden storms. A well-finished solar panel withstands the test of time, maintaining its efficiency in the face of nature’s fury.
Applying a high-quality sealant over the edges of tempered glass and around the junctions fortifies your solar panel’s defenses. This weatherproofing step transforms a fragile assembly into a resilient, enduring power generator. When adding sealant, ensure an even, generous layer that covers all vulnerable seams. This prevents water ingress and minimises the risk of corrosion or short circuits—crucial considerations when understanding how to make a solar panel for long-term use.
To achieve a seamless finish, consider the following steps:
- Clean the entire surface thoroughly, removing dust and debris that might compromise adhesion.
- Apply the sealant in a continuous bead, focusing on corners and edges where leaks are most likely.
- Allow the sealant to cure fully, respecting the manufacturer’s drying time—patience here ensures durability.
By meticulously sealing and finishing your solar panel, you craft not just a component but a fortress of solar power—standing strong against South Africa’s sun-drenched days and stormy nights. The final flourish of this process embodies both craftsmanship and foresight, ensuring your solar energy system will endure and thrive long into the future.
Testing and Optimizing Your DIY Solar Panel
Measuring Voltage and Current – Using a Multimeter for Performance Check
Once your DIY solar panel is assembled, the journey toward harnessing the sun’s potent energy continues with meticulous testing and optimization. Measuring voltage and current with a multimeter reveals the true performance of your creation—like unlocking a secret treasure trove of potential. This step is crucial in understanding whether your solar panel is converting sunlight efficiently or if adjustments are needed to maximize its output.
Using a multimeter, set it to measure voltage (V) and current (A), and carefully test under actual sunlight. Expect to see a voltage close to the panel’s rated specifications, with current varying based on light intensity. If the readings fall short, consider inspecting connections or ensuring the solar cells are clean and unobstructed. Regular testing not only confirms your panel’s efficacy but also guides fine-tuning for peak performance.
Performance check isn’t just about numbers; it’s an art of patience and precision. Keep an eye on fluctuations—because in the dance of sunlight and shadow, every detail counts. With careful measurement and ongoing optimization, your homemade solar panel becomes a testament to ingenuity and sustainable progress in South Africa’s vibrant quest for greener energy solutions.
Ensuring Efficiency – Maximizing Light Exposure and Fixing Faults
In the vibrant landscape of South Africa’s renewable energy revolution, understanding how to make a solar panel that performs optimally is both an art and a science. As sunlight dances across the savannahs and bustling cities alike, your homemade solar panel must harness its full potential to truly shine. The key lies in meticulous testing and strategic optimization, transforming your creation from simple components into a powerhouse of sustainable energy.
Maximizing light exposure is fundamental. Position your solar panel where it can greet the sun’s rays without obstruction, adjusting angles seasonally to capture the most sunlight. Keep the surface clean and free of dust or debris—every speck can diminish efficiency. Once your panel is in place, regular performance checks with a multimeter reveal how well it converts sunlight into electricity. Fluctuations in voltage or current signal opportunities for improvement, whether that’s fixing loose connections or replacing damaged cells.
To ensure your solar panel operates at peak efficiency, consider implementing a systematic approach:
- Inspect all wiring for corrosion or damage
- Ensure the solar cells are clean and unobstructed
- Adjust the panel’s tilt to optimize sunlight absorption
- Replace or repair faulty components promptly
Through patience and precision, each tweak enhances the performance of your solar panel. Witnessing its steady output grow becomes a testament to your craftsmanship—an inspiring beacon of sustainability in South Africa’s quest for greener energy solutions. In the delicate dance of light and shadow, every detail counts, and mastering how to make a solar panel means unlocking the sun’s endless promise.
Understanding Output – Estimating Power Generation
Understanding the output of your homemade solar panel is essential in ensuring it performs at its best. Once you’ve assembled your solar cells and connected the electrical components, the next step is to gauge how much energy your DIY creation can generate under South Africa’s abundant sunlight. This process of testing and optimizing transforms your craft into a resilient power source, capable of lighting up rural homes or powering small farms.
To estimate the power generation, start by measuring the voltage and current using a multimeter. Record these readings at different times of the day to account for variations in sunlight. This real-time data provides a clearer picture of your panel’s efficiency and highlights areas for improvement. For instance, if voltage dips during certain hours, it might suggest shading or misaligned angles. Regularly reviewing your measurements helps you fine-tune your setup for maximum output.
- Track the voltage and current readings consistently throughout the day.
- Compare the data against the theoretical power output based on your panel’s size and solar insolation in your region.
- Adjust the panel’s tilt or clean its surface if you notice dips in performance.
By paying close attention to these details, you deepen your understanding of how to make a solar panel that is both efficient and durable—an empowering step towards sustainable energy independence in South Africa’s vibrant landscape.
Installing and Maintaining Your Homemade Solar Panel
Placement Tips – Best Sunlight Exposure Zones
Positioning your homemade solar panel isn’t just about catching the sun; it’s about embracing the dance between light and shadow, understanding that optimal placement can amplify your energy harvest exponentially. In South Africa’s sun-drenched landscape, choosing the right spot can mean the difference between a modest trickle and a robust flow of power. When considering how to make a solar panel, don’t overlook the importance of placement—think of it as setting the stage for a performance where the sun is the star performer.
Ideally, your solar panel should face true south (or north in the southern hemisphere) to maximize sunlight exposure throughout the day. The angle of tilt is equally vital—aim for an inclination equal to your latitude to ensure year-round efficiency. Avoid shaded areas caused by trees, buildings, or uneven terrain, as even a small shadow can significantly diminish output. For best results, consider zones with minimal obstructions and consistent sunlight, making your homemade solar panel an unyielding source of renewable energy. Remember, the pursuit of sustainable power is a reflection of our deeper commitment to harmony with the environment and ourselves.
Mounting Techniques – Securing the Panel for Stability and Safety
Securing your homemade solar panel is the final act in a symphony of craftsmanship, where stability and safety are paramount. An unstable mount not only risks damage but can also diminish your panel’s efficiency, turning a potential powerhouse into a precarious perch. When learning how to make a solar panel, attention to mounting techniques transforms a simple project into a resilient marvel of renewable energy.
Begin by selecting a sturdy, weather-resistant base—wood, metal, or concrete—crafted to withstand South Africa’s diverse climate. The mounting structure should be expertly aligned, with a tilt angle matching your latitude for optimal sunlight capture. Use corrosion-resistant fasteners and brackets to ensure longevity and safety. To enhance durability, consider reinforcing the framework with cross braces or additional supports, especially if your panel will be exposed to strong winds or heavy rains.
For added security, employ a combination of anchoring methods—such as concrete footings for ground mounts or wall brackets for rooftop setups. These techniques prevent shifting and wobbling, safeguarding your energy harvest against unpredictable weather. Remember, a well-secured solar panel isn’t just safer—it’s more efficient, capturing sunlight with unwavering precision day after day.
Here’s a quick overview of the essential steps in mounting your solar panel:
- Position the mounting frame on a level surface or structure.
- Ensure the tilt angle aligns with your geographic latitude for maximum exposure.
- Secure the frame with appropriate fasteners, checking stability at each step.
- Seal all joints and mounting points to prevent water ingress and corrosion.
When your solar panel is firmly mounted, it becomes a steadfast beacon of sustainable energy, ready to perform consistently in the vibrant landscape of South Africa. The art of mounting is not merely about stability; it’s about crafting a foundation that respects the dance of light and shadow, ensuring your homemade solar panel remains a reliable source of power for years to come.
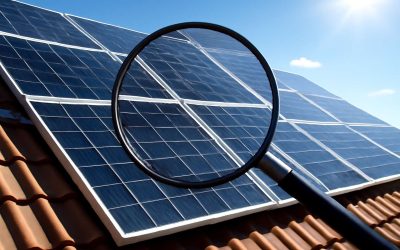
Regular Maintenance – Cleaning and Inspection Procedures
In the relentless pursuit of sustainable energy, the longevity and performance of your homemade solar panel hinge on diligent upkeep. Regular maintenance isn’t merely a chore; it’s a ritual that preserves the intricate dance between sunlight and silicon, ensuring each photon translates into usable power. Cleanliness is paramount—dust, bird droppings, or debris can act as invisible barricades, diminishing efficiency. A gentle, consistent cleaning routine with non-abrasive cloths and mild soap can rejuvenate your panel’s ability to absorb sunlight.
Inspection follows cleaning—each glance should be a meticulous audit for cracks, corrosion, or loose connections. Over time, environmental factors such as heavy rains or intense sun exposure can loosen fasteners or foster corrosion, compromising structural integrity and electrical safety. If you’re wondering how to make a solar panel withstand South Africa’s capricious weather, pay particular attention to sealing and waterproofing joints, as these are often vulnerable points.
For optimal results, incorporate a systematic approach:
- Examine the mounting frame for stability and signs of wear.
- Test electrical connections with a multimeter to ensure consistent voltage output.
- Clear away any obstructions that might cast shadows or block sunlight.
Maintaining your solar panel isn’t just about upkeep; it’s a philosophical act—an acknowledgment that energy independence demands vigilance, patience, and respect for the delicate interplay of light, material, and environment. When you understand how to make a solar panel last through careful maintenance, each day’s sun becomes a testament to your commitment to renewable energy and sustainable living.
Legal and Safety Considerations When Building a Solar Panel
Building Codes and Permits – Checking Local Regulations
Legal and safety considerations are paramount when delving into the process of how to make a solar panel, especially within South Africa’s evolving regulatory landscape. Ignoring local building codes and permit requirements can result in hefty fines, delays, or even the dismantling of your meticulously crafted solar system. It’s essential to conduct thorough research—consult municipal authorities or energy departments to understand specific regulations that govern solar panel construction and installation.
For instance, many regions mandate adherence to safety standards that include proper wiring practices, grounding procedures, and weatherproofing protocols. Additionally, securing the necessary permits ensures your project aligns with environmental and safety legislation, safeguarding both your investment and the community’s well-being. Remember, regulations vary significantly from one locality to another; thus, an informed approach is crucial when embarking on how to make a solar panel in compliance with legal frameworks.
Electrical Safety Tips – Avoiding Short Circuits and Overloads
When venturing into the process of how to make a solar panel, understanding legal and safety considerations is crucial. Electrical safety cannot be overstated—improper wiring or handling of components can lead to dangerous short circuits or overloads, jeopardizing both the project and personal well-being. In South Africa, where sunlight is abundant but regulations are evolving, ensuring compliance with safety standards is essential to avoid costly setbacks or accidents.
One vital safety tip is to always disconnect power sources before working on electrical connections. Wearing appropriate safety equipment like gloves and safety glasses offers additional protection against electric shocks and sparks. Additionally, employing proper wiring practices—such as using insulated wires and secure connections—helps prevent potential hazards. To facilitate a safe and efficient build, consider following this sequence:
- Test all components thoroughly before assembly.
- Use a multimeter to verify voltage and current at each stage.
- Ensure all connections are solid and insulated properly.
By adhering to these safety protocols, you not only safeguard your project but also ensure it meets South Africa’s safety standards. Remember, building a solar panel is as much about respecting electrical safety as it is about harnessing the sun’s power—because a well-built, compliant system promises long-term sustainability and peace of mind.
Environmental Impact – Proper Disposal of Materials
Building a solar panel isn’t just about harnessing the sun’s abundant energy; it’s also a profound act of environmental stewardship that requires careful attention to legal and safety considerations. In South Africa, where the sunlight is plentiful and renewable energy initiatives are gaining momentum, understanding the legal framework ensures your project remains compliant and safe. Proper disposal of materials is equally vital—discarding photovoltaic waste responsibly minimizes environmental impact and aligns with sustainable practices. Improper disposal can lead to soil and water contamination, undermining the very goal of renewable energy adoption.
When learning how to make a solar panel, always prioritize environmental responsibility by adhering to local regulations for waste management. Many components, such as damaged solar cells or old wiring, contain hazardous substances and should be disposed of through certified recycling centers. Additionally, follow safety protocols to prevent electrical accidents. For instance, always disconnect power sources before handling electrical components and wear safety equipment like gloves and glasses to mitigate risks.
Incorporating environmentally conscious practices into your solar panel project not only aligns with South Africa’s evolving regulations but also promotes the longevity and sustainability of your system. Responsible disposal and safety adherence are foundational pillars—turning a simple DIY project into a meaningful contribution toward a cleaner, greener future!
0 Comments